Ministry Settings is where you configure your ministry's name, services, lesson rhythm, and third-party connections. Think of it as the control panel for your Teach Us the Bible account.
Two things to know about this page:
- Everything saves automatically. There's no Save button — each change is saved the moment you make it, and a small Saved ✓ appears next to the section title to confirm.
- The chips across the top are your setup at a glance — your subscription, services, and connections. Solid chips jump to that section; dashed ones are features you haven't turned on yet.

Your Ministry
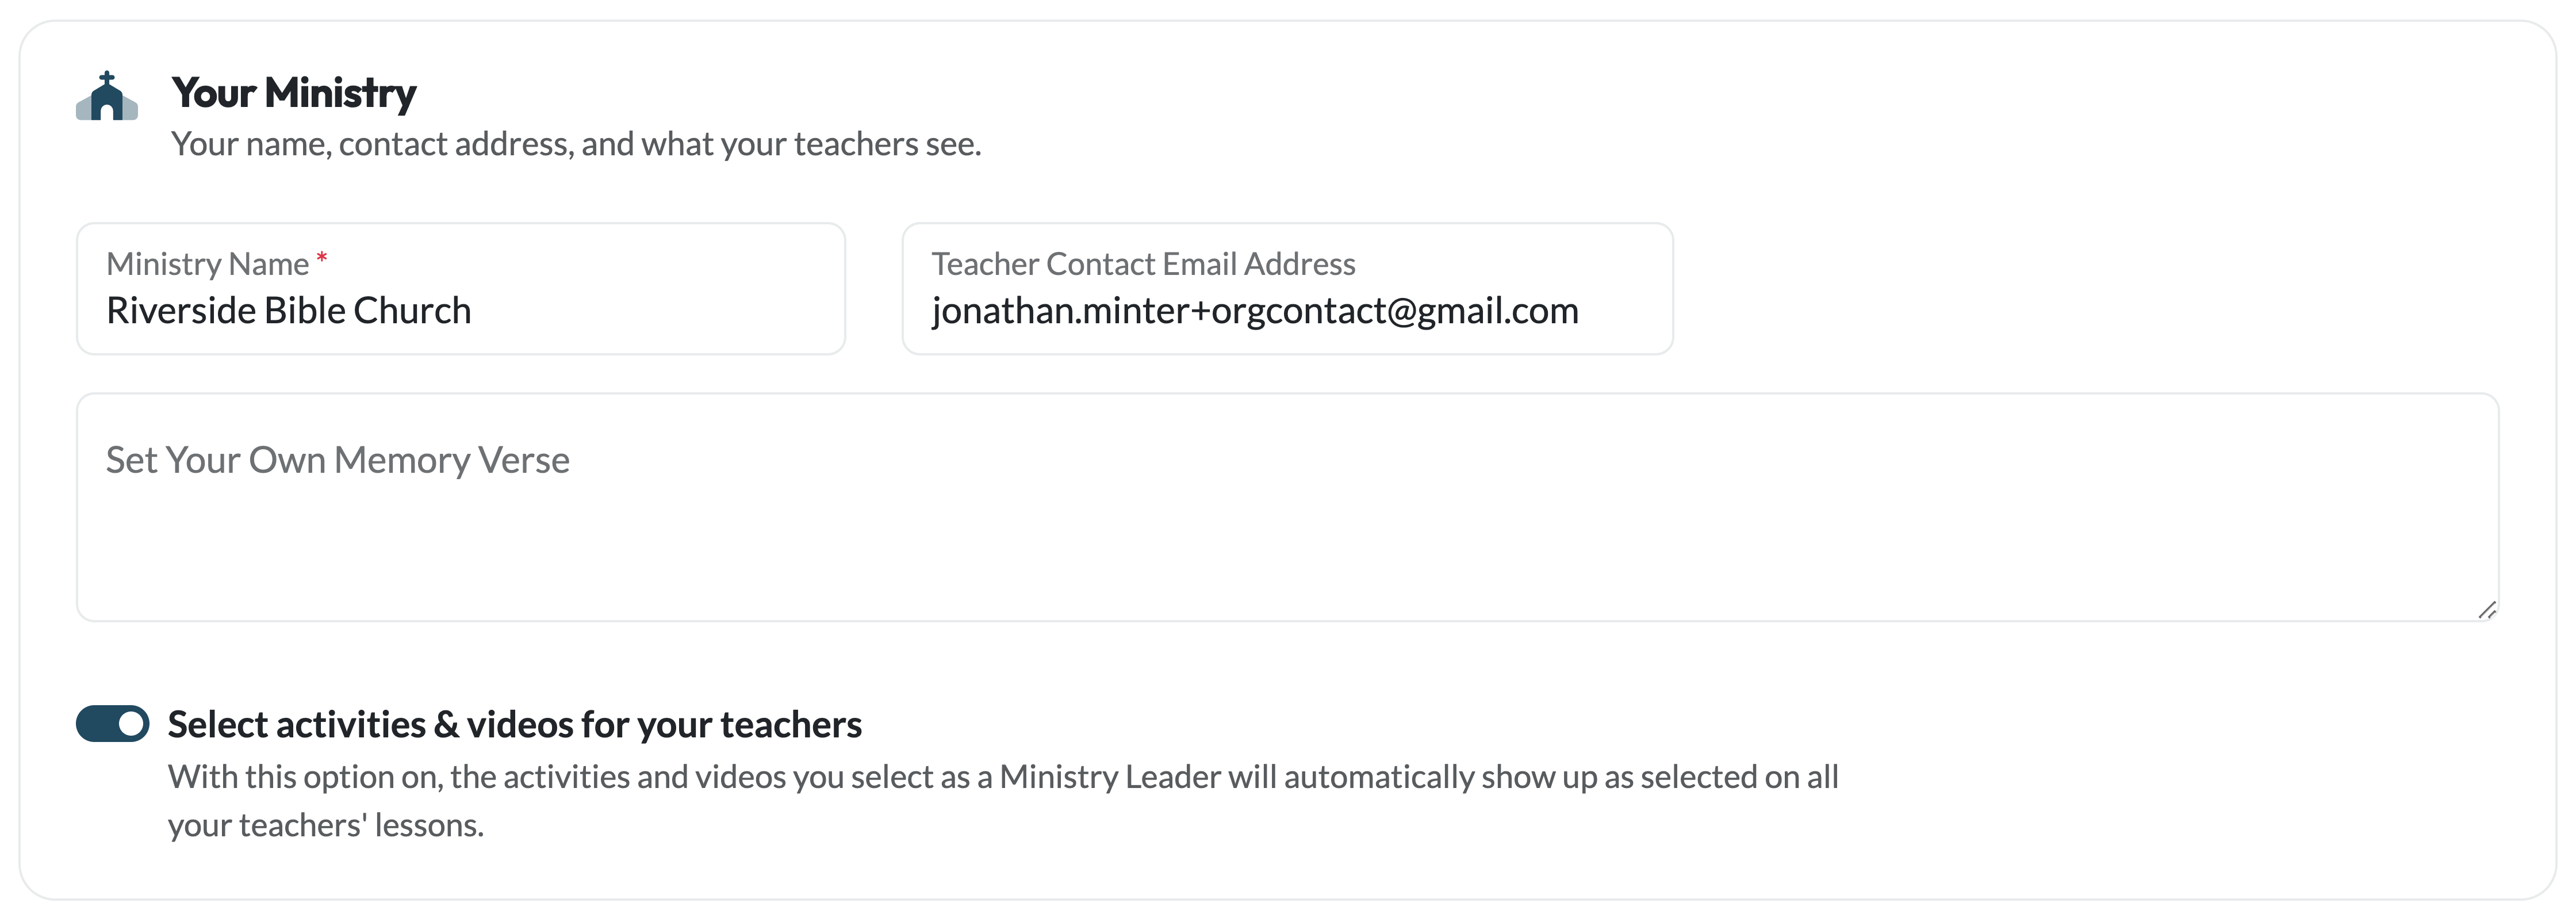
Update your ministry name and contact email. Your ministry name appears on your team's dashboard and in the parent portal — parents see "Join [Church Name]" when they register. The contact email is where Teach Us the Bible reaches your ministry with account and subscription emails.
Memory Verse
Each lesson in the curriculum includes a built-in memory verse that rotates every four lessons. If your ministry is using a different verse — for example, one tied to a sermon series or a passage you're working through as a team — you can enter it here and it will override the curriculum's default verse on every lesson page.
Leave this blank to use the curriculum default, which changes automatically with each new lesson cycle.
Services & Lesson Rhythm
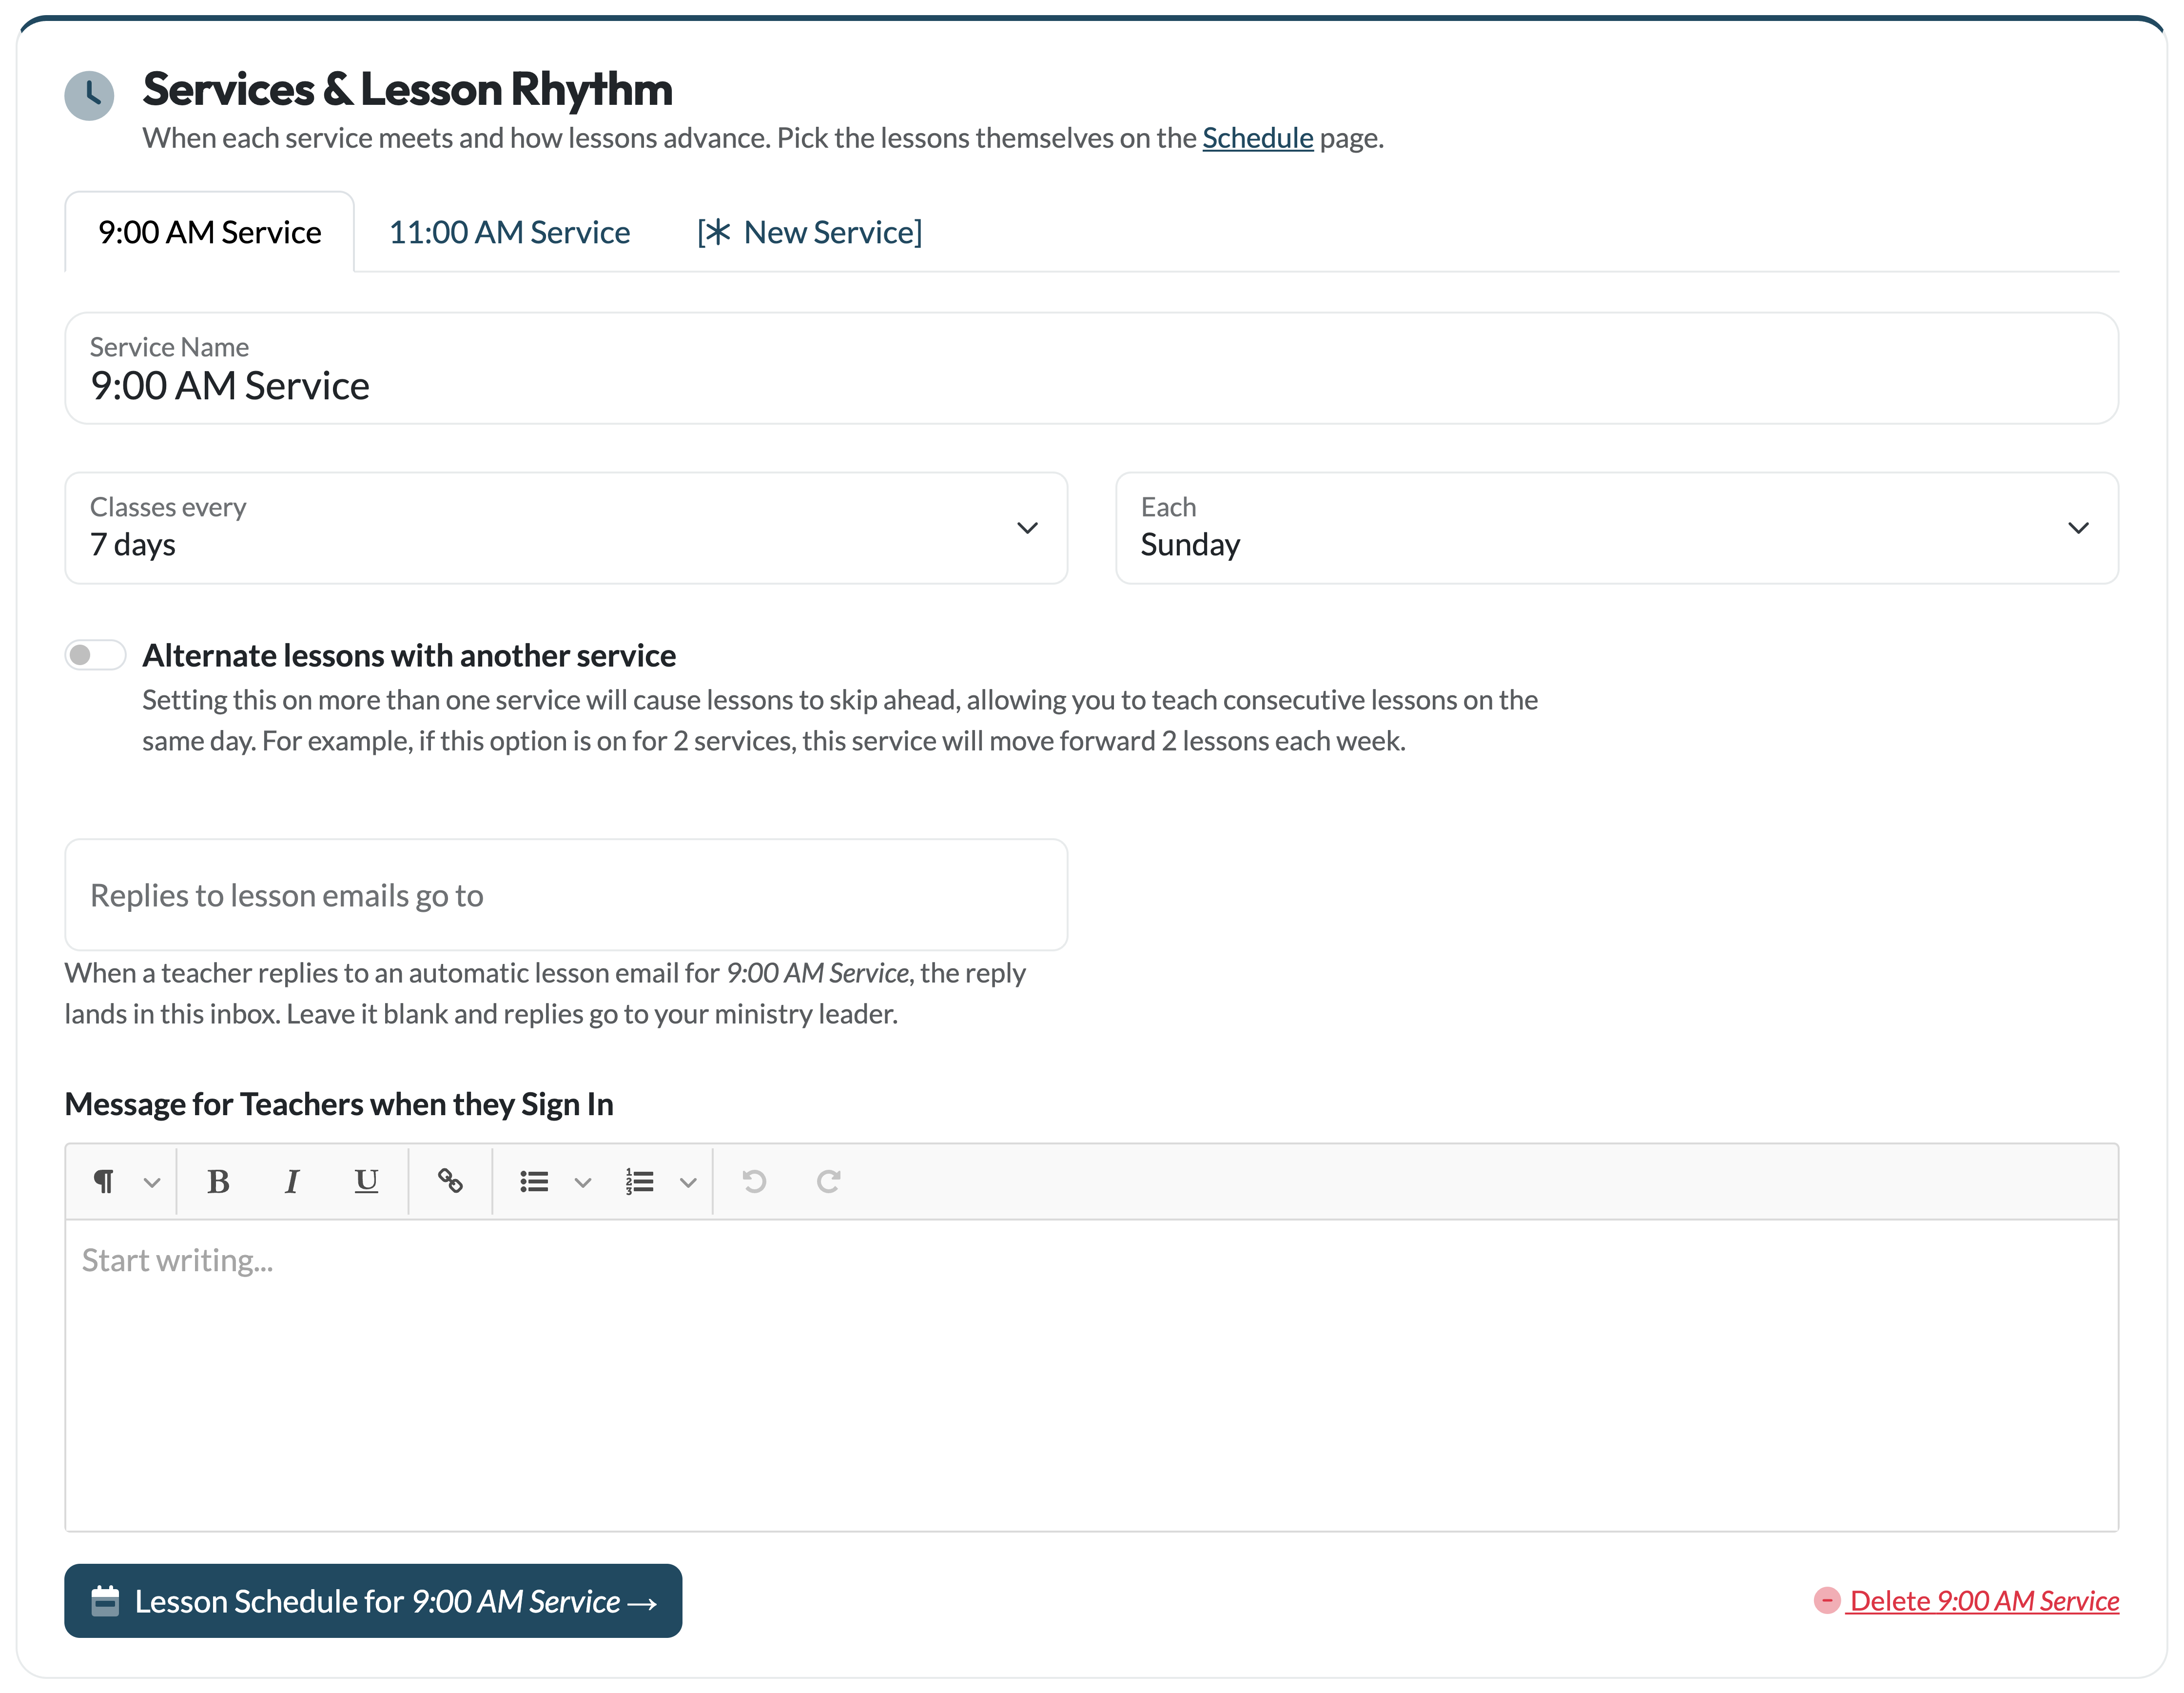
Each service your ministry runs — a 9am and an 11am, or a Sunday morning and a Wednesday night — gets its own tab here, with its own name, meeting rhythm, and lesson schedule. Teachers are assigned to a service on the Your Team page so they see the right schedule when they log in.
For each service you can set:
- Classes every / Each — how often the class meets (weekly up to every 4 weeks) and on which day. This sets the rhythm; the lessons themselves are picked on the Lesson Schedule page. Changing the rhythm later doesn't reshuffle a schedule you've already built — visit the Lesson Schedule page to adjust it.
- Alternate lessons with another service — turn this on for two (or more) services that trade off lessons each week, so every child hears every lesson regardless of which service they attend. See the Lesson Schedule article for a full walkthrough.
- Replies to lesson emails go to — when a teacher replies to an automatic lesson email for this service, the reply lands in this inbox. Leave it blank and replies go to your ministry leader. Handy when the 9am coordinator isn't the Wednesday-night coordinator.
- Message for teachers when they sign in — a note your teachers see on their dashboard, per service. Great for announcements or a weekly word of encouragement.
Use the [New Service] tab to add a service, and the delete link inside a tab to remove one (your ministry always keeps at least one).
Selecting Activities & Videos for Your Teachers
The "Select activities & videos for your teachers" switch lets you, as the Ministry Leader, curate each week's lesson for your team. With it turned On, the reinforcement activities and the video you select on a lesson page automatically show up as selected for every teacher in your ministry — so your whole team is pointed at the same activities and video without each teacher having to choose.
To make your picks, open a lesson and use the print toggle on each activity and the Use this video button on the video you want. Teachers will see your selections highlighted, with the chosen video marked as the Leader's pick.
This setting also drives the Email Teachers defaults: when it's on, the activity and video sections of the email default to sending only what you've selected.
Leave it Off if you'd rather each teacher choose their own activities and videos.
Automatic Lesson Emails
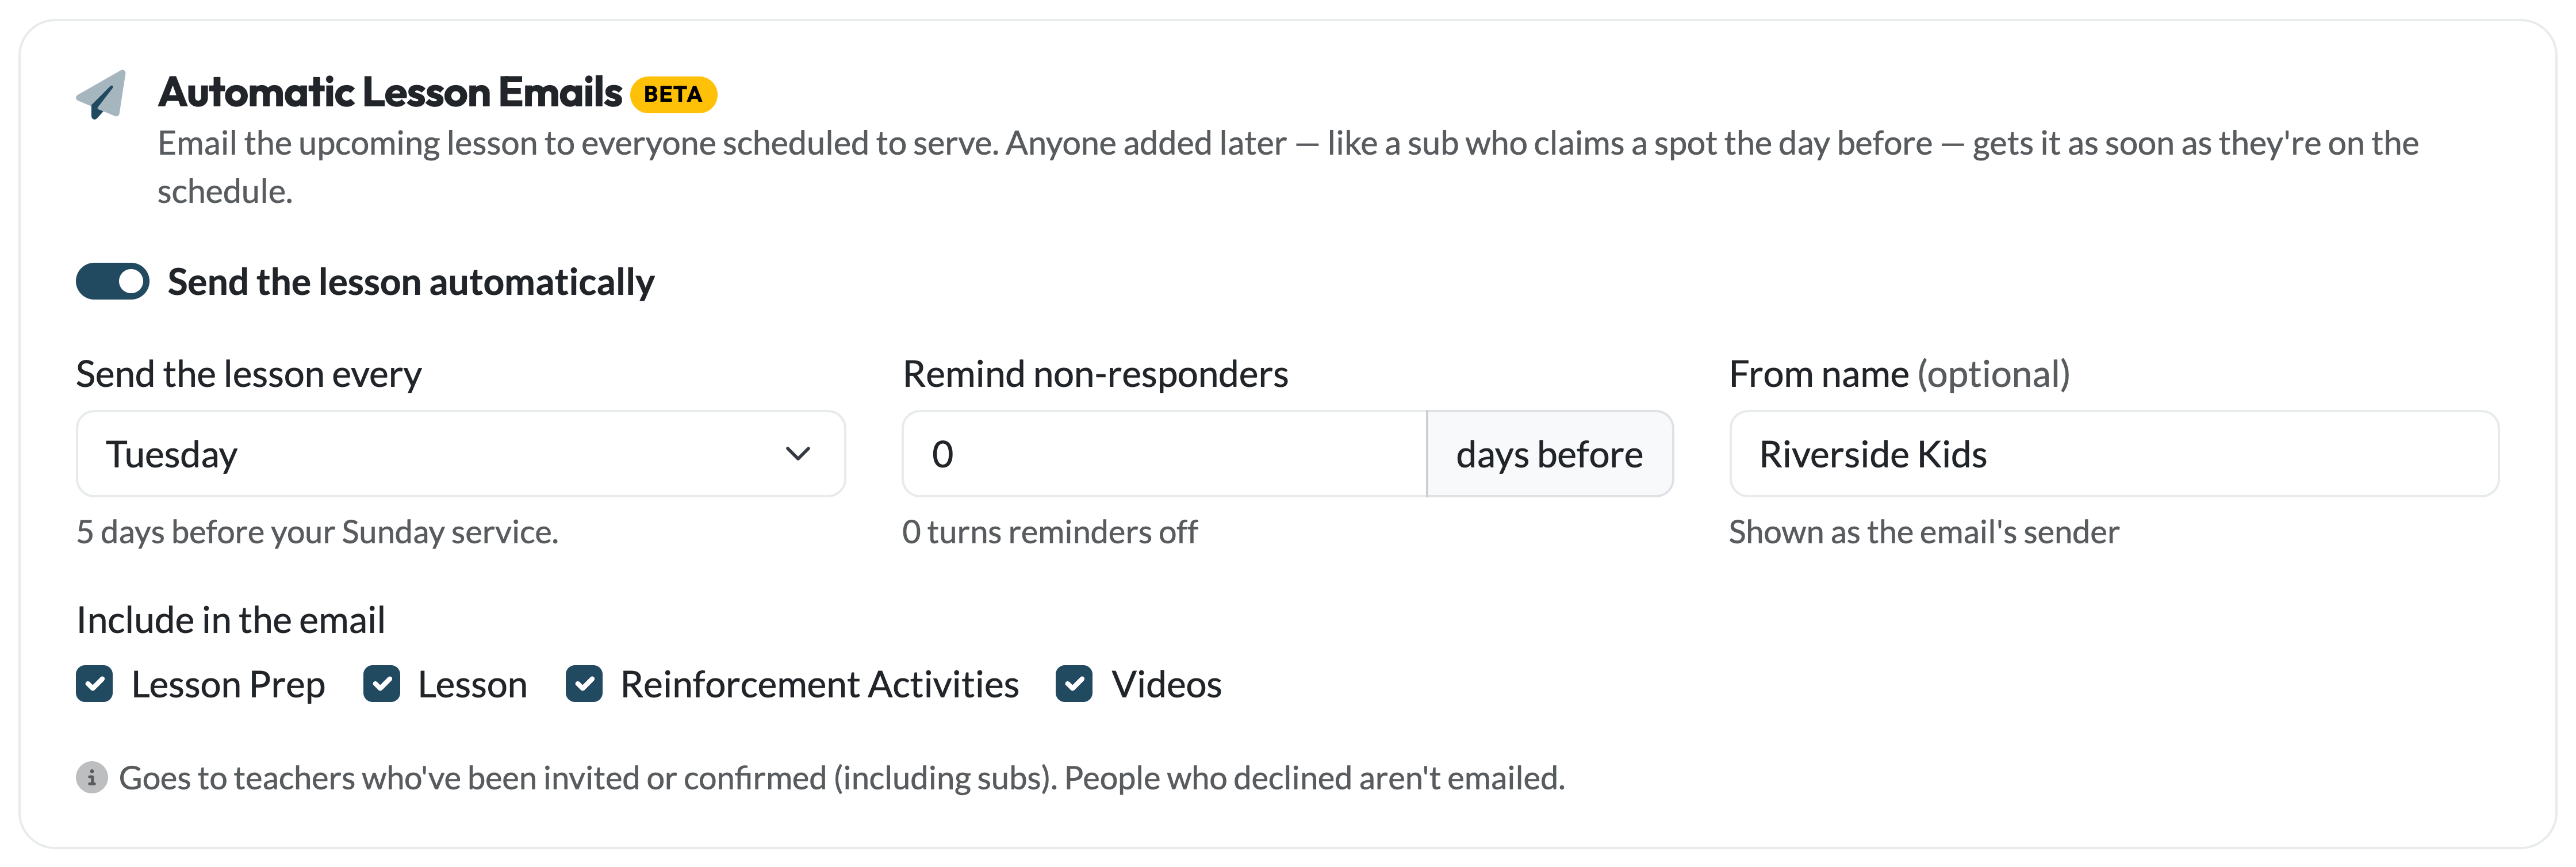
Once you've scheduled teachers or connected Planning Center, an Automatic Lesson Emails section appears here. It emails the upcoming lesson to everyone scheduled to serve — you choose how far ahead it goes out, which parts of the lesson to include, whether non-responders get a reminder, and the sender name on the email.
If you're connected to Planning Center, you can also add Planning Center teams here, so people scheduled in PCO get the lesson too — nobody gets it twice if they're in both places.
The Automatic Lesson Emails article covers all of it in detail.
Planning Center Connection
If your church uses Planning Center Services, connect it from the Connect Planning Center card at the bottom of this page:

Once connected, a Planning Center section appears where you can set up auto-sync teams (people added to a team in PCO automatically get a Teach Us the Bible account), run a sync on demand, review the sync history, and disconnect.
Connecting also unlocks team import in Email Teachers and Planning Center recipients for the automatic lesson emails. See the Planning Center Integration article for a full step-by-step guide.